In our previous article, we wrote about a third party application called Office Image Extraction Wizard. It helps you to easily extract images from Office documents. This tool is very useful as it works with multiple documents.
But if you decide not to use this third party application, you can consider trying the method that we’re about to show you. No, it’s not the time-consuming copy-and-paste-to-paint method. Read more for details.
Note : This method works with documents in 2007 office suite (or later including Office 2016 Preview), including Word (.docx), Powerpoint (.pptx) and Excel (.xlsx).
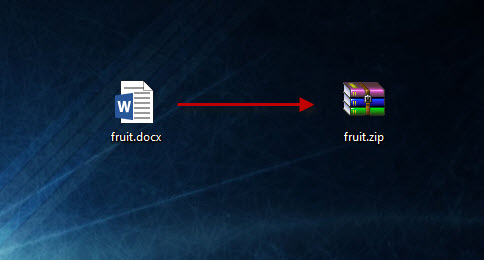
Using this method, you need to do a simple conversion of the file name extension from .docx (.pptx or .xlsx) to .zip format. All the images can be found inside the now .zip file. Okay, let’s go through the steps one-by-one. We use a Word document as an example.
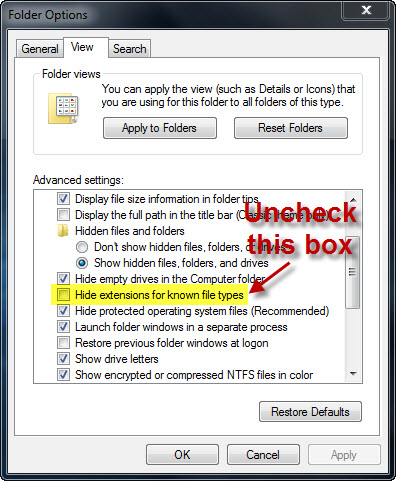
First, rename the document that you want to extract the images by right-clicking on the file and click Rename. Or click to select the file and hit the F2 button. Change the .docx file format to .zip. If you don’t see .docx in your file name, you need to unhide it. If you have no idea how, this link can help (Windows 8.1, 7 and Vista).
Next, double-click to open the .zip file (previously a .docx). You can find all extracted images in word > media. To open a .zip file, a data compression tool like WinRAR or Winzip is required.
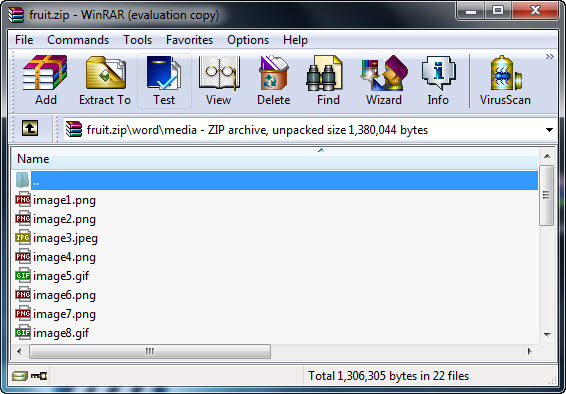
Use the steps for Powerpoint (.pptx) and Excel files. The images are located in ppt > media and xl > media for Powerpoint and Excel respectively. The next time you want to extract images from Word, Powerpoint or Excel and you don’t have Office Image Extraction Wizard installed, you can always use this method.


