Okay, I see you still have spare and unused USB flash drives even after using one to install Linux. Now, what else can you do with the rest of flash drives? If you have one USB flash drive with at least 4GB of storage capacity, you can consider putting the whole Windows 8 Consumer Preview Installer into it. In other words, instead of burning the Windows 8 ISO file into a DVD, you are going to build a Windows 8 Installer using your USB flash drive. Isn’t it a good idea? Read on if you are interested.
To create a bootable Windows 8 USB drive, you will need the ISO DVD image file for the Windows 8 Consumer Preview itself (you can download it here), a NTFS-formatted flash drive with at least 4GB capacity (the larger, the better), a computer running Windows Vista or Windows 7 and last but not least, a tool that enables you to create the bootable copy of Windows 8 on your USB flash drive. That tool is called the Windows 8 USB Installer Maker.
To get started, you can get both the Windows 8 CP ISO file and Windows 8 USB Installer Maker downloaded to your computer. After download, extract the contents of Windows 8 USB Installer Maker to the destination of your choice.
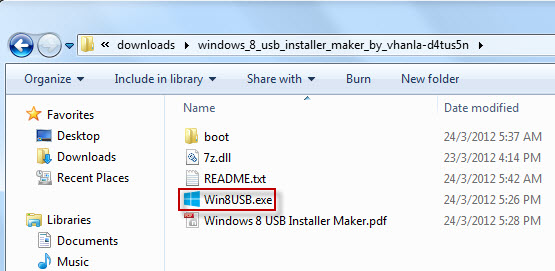
Now, connect your USB flash drive to the computer. Then, run the Win8USB.exe by right-clicking the executable file and choose “Run as Administrator”. Keep in mind that the tool requires administrator rights to run.
This is the main windows of Windows 8 USB Installer Maker.
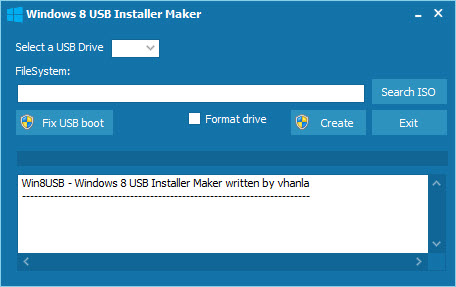
Now, select the USB drive with correct drive letter. Make sure it has NTFS file system format with at least 4GB of storage capacity.

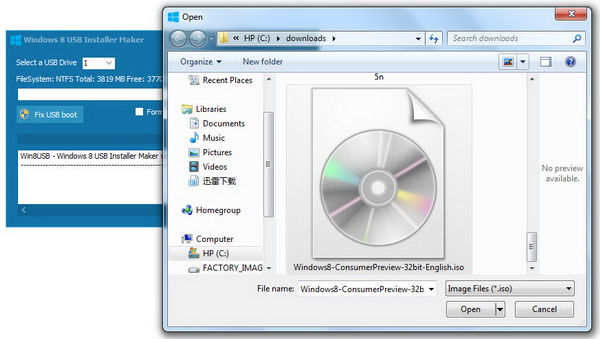
Next, locate the ISO DVD image file of the Windows 8 Consumer Preview from your computer. The ISO file should have already downloaded to your computer. If not, please download it here.
Tick the option to format your USB drive and hit the “Create” button to start the process. The tool will first format your USB drive to NTFS. If your USB drive is FAT32 formatted, it will be automatically formatted to NTFS file system format.
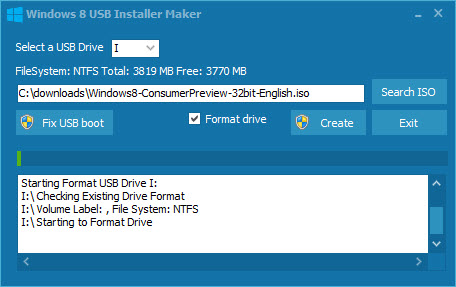
After that, the tool will start copying all Windows 8 installation files from the ISO image to your USB drive. This process takes quite some time to complete, so please be patient. You can carry out other tasks first while waiting for the process to complete.
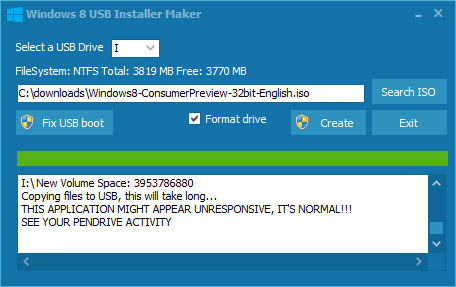
After a while, the copying process should has completed.
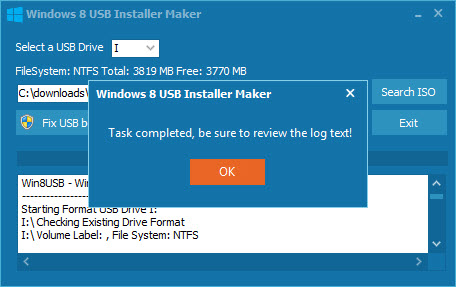
The bootcode should be successfully updated to your USB drive, meaning that the USB drive is now bootable. Make sure you see the “Successfully updated NTFS filesystem bootcode” message from the log text. If not, click the “Fix USB boot” to fix the issue.
Now, you can ready to put the bootable Windows 8 USB flash drive to test. Simply boot your system, then set in your computer’s BIOS the option to boot from USB drives. Enjoy!
Related


