Hate the usual way to eject your USB device from the computer? Try USB Disk Ejector. It enables you to quickly and safely remove your USB device from your system using a hotkey shortcut. Now, this is interesting, right? Read on.
The USB Disk Ejector has seen much improvement in term of functionality despite still using same old interface when we first reviewed this piece of application back in 2008.
This is the main window of USB Disk Ejector. In the main window, you will see all the connected USB devices as well as memory cards and Firewire disks are displayed here.
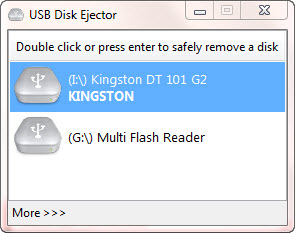
To eject a particular connected USB device, you can simply double click or press enter, walla your USB device is now safe to be unplugged. This method is highly recommended if you need to remove multiple USB devices at the same time from the computer.
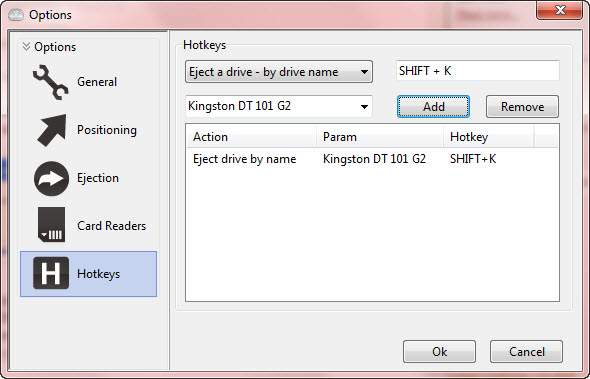
But if you have one or two USB devices (memory cards as well) that you use quite frequently, then using hotkey shortcut is a much better way. Now, you probably want to assign a hotkey shortcut to that particular USB device. Hit “More >>>” at the bottom of the application, then click “Options” to reveal the options window.
Then, go to the “Hotkeys” section. You can now assign hotkeys to bring the app to front or eject a USB device, either by drive name, drive letter, drive label and drive mountpoint. Here, we recommend you to select “Eject a drive – by drive name”. Select your USB drive from the drop down menu (make your device is now plugged to your system) and assign a hotkey shortcut. In my case, I use Shift+K as the hotkey.
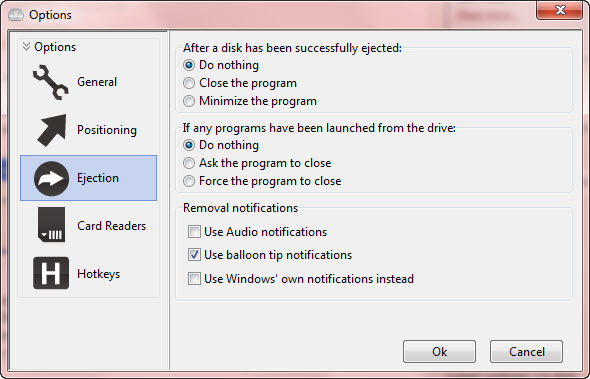
Another interesting feature is the ability to configure the ejection and removal notifications of your USB devices. For example, you can instruct the application close or minimize once a device has been successfully ejected from your computer. Also, you can automatically close any running programs from the device after the device is disconnected.
USB Disk Ejector requires no installation to run and is compatible with Windows 7, Vista, XP, 2008 and 2003.
Related


