Data loss can happen in many ways. Hard drives failure, software errors, viruses and malware attacks or simple human mistakes can wipe out all your valuable data. That’s why it is important to care about data loss prevention and backup your critical data. To take care of this crucial task, you need a really reliable backup software. Guess what, I have just the prefect backup program for you.
![]() Handy Backup by Novosoft (www.handybackup.net) is an award-winning automatic data backup and disaster recovery software for home and small to medium business environments. The latest version of Handy Backup 6.4 is compatible with Windows 2000, 2003 Server, XP, 2008 Server, Vista and 7.
Handy Backup by Novosoft (www.handybackup.net) is an award-winning automatic data backup and disaster recovery software for home and small to medium business environments. The latest version of Handy Backup 6.4 is compatible with Windows 2000, 2003 Server, XP, 2008 Server, Vista and 7.
Handy Backup doesn’t consume a lot of resource and has a friendly and easy-to-use interface with three types of tasks available : backup, recovery and synchronization. With the task-based wizard-driven interface, performing all the three tasks are like a stroll in the park. Even if you are a total newbie to Handy Backup, the tasks can be carried out without much trouble.
How to Backup Data using Handy Backup?
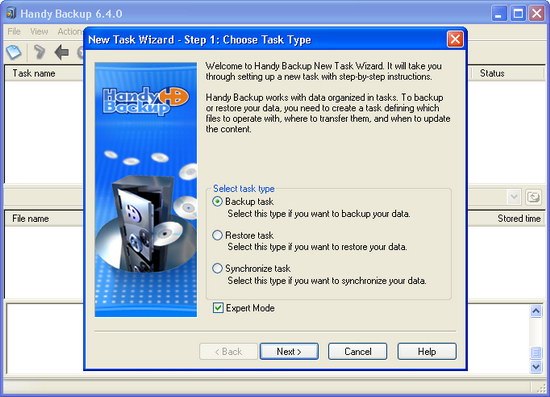
Now, let’s us take a closer look on how to create a new backup task. From the toolbar, click on the “New Task” icon to bring up the New Task Wizard. This wizard also can be accessed via File menu and Ctrl+N shortcut key.
The first screen of the wizard enables you to choose the task type that you want to perform. Here, we select Backup task.
Now, on to the second step. This step requires you to choose the files and folders to backup. In addition to “common” file and folder backup, there is a number of presets that facilitate backups of critical data, such as data located on a FTP server, My Documents, Windows registry, Microsoft Outlook, disk image and database backup etc.
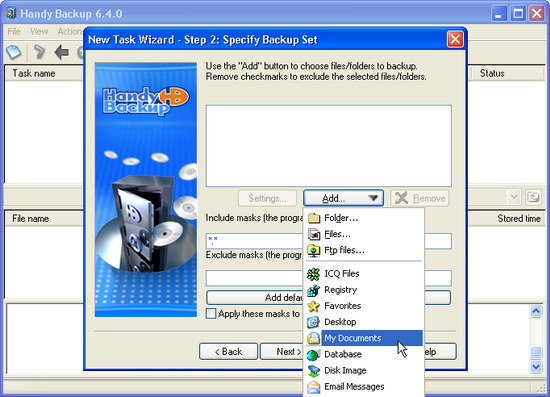
If you choose the Expert mode (from the first screen), you can use the file mask filtering where you can set exclusion filters to ignore temporary files or backup only the selective file formats. If you have no idea what extension the temporary files used, just click on the “Add default temporary extensions” button.

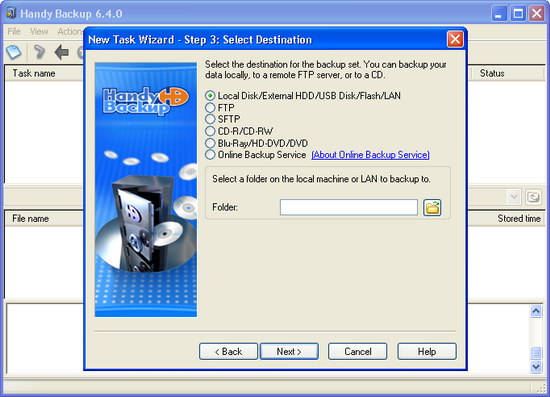
For the third step, you are require to select the destination for the backup set. You can backup to virtually any type of storage media. This includes backup to DVD, Blu-Ray, CD, any local or external HDDs, network drives, remote FTP servers and even to Handy Backup’s online backup service.
The Advanced Settings screen lets you select full or incremental backup and store backups with timestamps. The file-specific settings enables you to skip backup of read-only files, hidden files and system files.
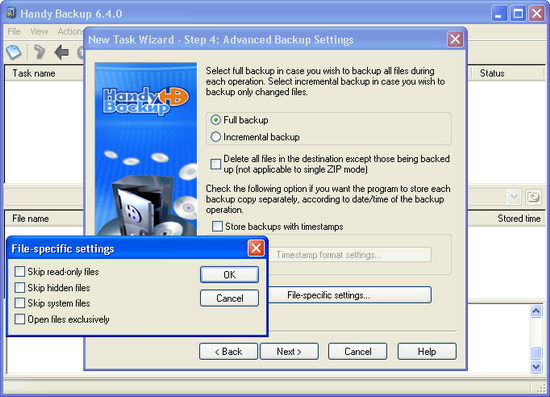
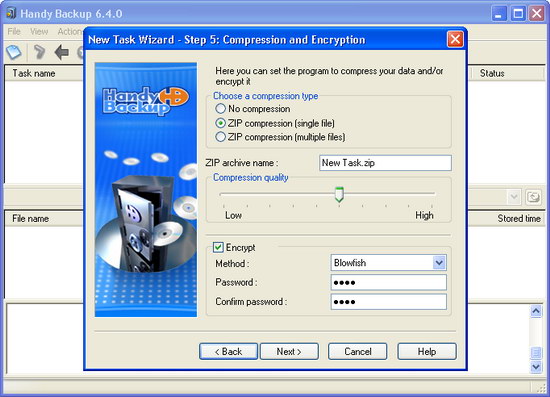
Step 5 enables you to protect your data with strong 128-bit file encryption and on-the-fly zip compression while Step 6 allows you to schedule your backup.
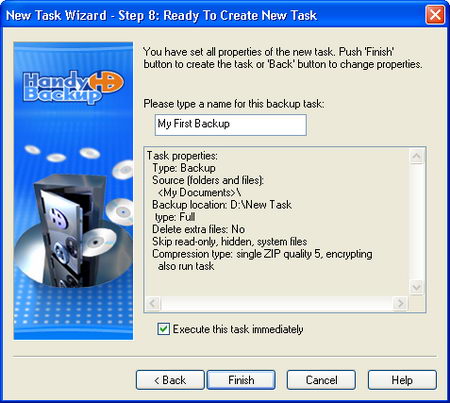
The seventh step allows you to set pre and post-operation actions on your new backup task. You can set up email notification for the backup results. Next is the last step of the wizard, input the name of your backup task and hit “Finish” to begin the backup process.
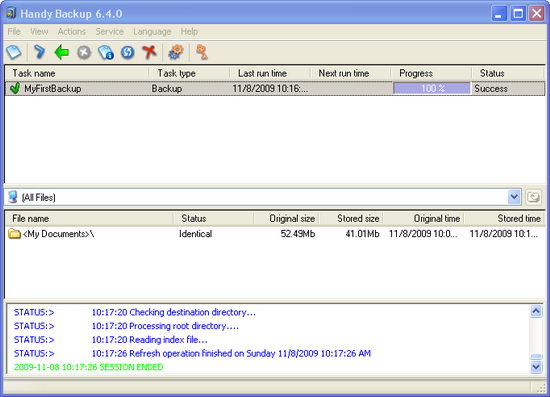
Data successfully backup!
For Restore and Synchronize task, I let you to explore it yourself. It shouldn’t be a big deal, right? 🙂
Conclusion
So if you need an easy, but powerful backup solution for your personal or business needs, Handy Backup is ready at your service. It comes as a full-featured 30-days trial version for you to test out. Try Handy Backup free for 30 days : Download Handy Backup.
Related


