


One of the main differences between self-hosted WordPress site/blog and free WordPress.com is the ability to use plugins. WordPress.com users don’t need to worry about updates for WordPress plugins because there is no plugin to begin with. For self-hosted WordPress blog, updating plugins can be a tedious task, especially when you have a handful of sites. You can expect new version of your installed plugins made available almost every single week. 🙁
Well, the good news is you don’t have to manually update the plugins when you can set the plugins to auto update. We are sure you are no stranger to Jetpack by WordPress.com plugin. Many of you if not all have this plugin currently installed on your WordPress. In fact, Jetpack is one of the must-have WordPress plugins. It adds powerful features previously only available to WordPress.com users including customization, traffic, mobile, content, and performance tools.
How to Auto Update WordPress Plugins?
Jetpack (click here to install if you don’t already have one) offers over 30 useful features, and one of them is the site management tool. It lets you auto update WordPress plugins.
Once you get Jetpack installed and activated, you will be prompted to connect your site with a WordPress.com account. Yes, you need an account with WordPress.com in order to use Jetpack. You can create one if you don’t have it. Skip this if you have the process done.
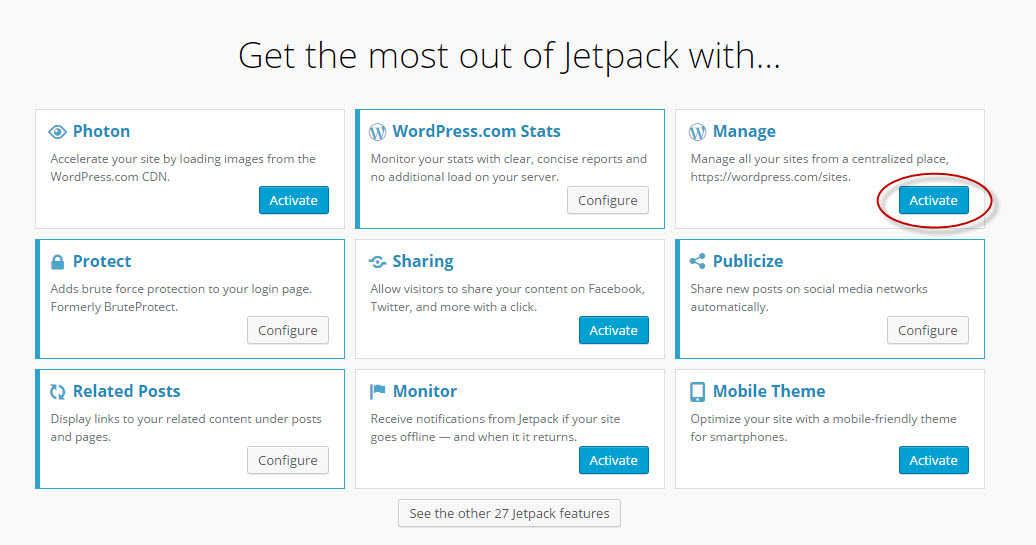
On the left pane of your WordPress backend, navigate to Jetpack > Jetpack to access Jetpack’s dashboard. Activate the site management tool by clicking the Activate button under the Manage heading.
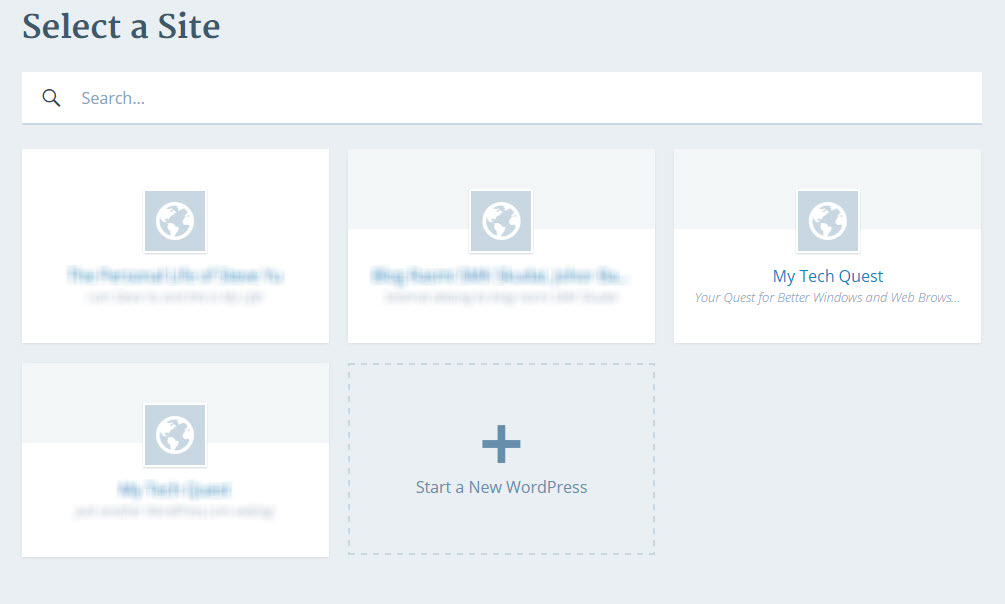
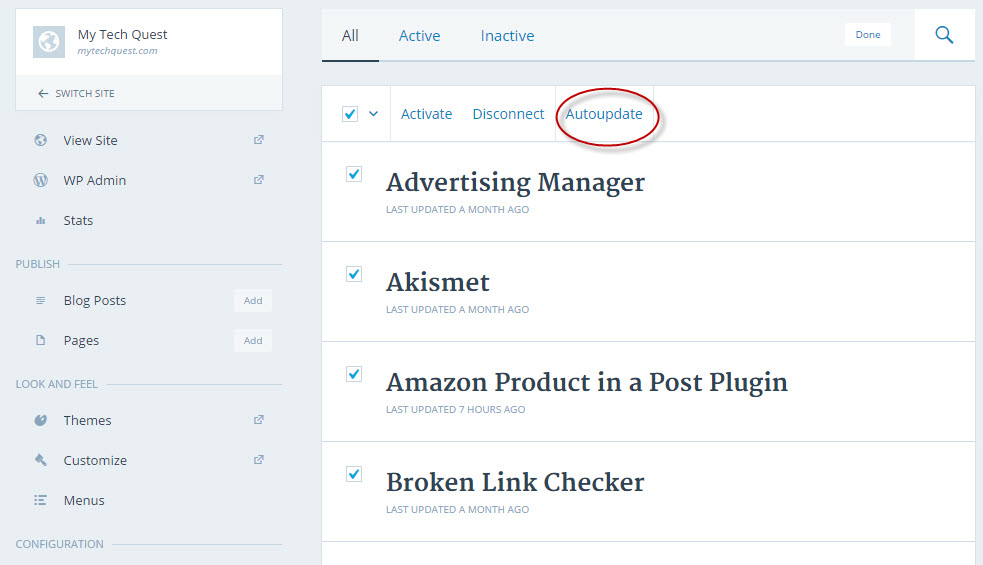
Now, head to this link. Choose the site that you want to configure. Look for Plugins option under Configuration menu.

All of your installed plugins will be displayed. Now, click the Manage button, then select all plugins (or some of them) and choose Auto update to enable the feature. That’s all.
Next time, you don’t have to worry about keeping the plugins up-to-date. They know how to take care of themselves. 🙂